
ATTO DIGITAL FAQ
How long does it take to charge when battery is fully drained?
The battery is fully charged in only 1.5 hours by connecting the device to the computer via the USB cable.
Setting up time and date stamp
Connect the recorder to a PC, via the USB cable provided in the box and access the folder RECORD in the partition of the device.
In the folder RECORD create a TEXT document with the name time.txt.
a. for Windows PCs - you can right-click in the folder RECORD and select NEW -≥Text Document.
Or go to Start menu and open Notepad, create the text file and then save it to the folder RECORD.
b. for Mac users - you can either install Notepad or go to Mac editor and select the plaintext format for your document in order to save a .txt file.
The first line should reflect current date and time with the format: yyyymmddhhmmss, as follows: yyyy – four digits format for year (ex. 2023),
mm - is 2 digits month (ex. for May is 05),
dd - 2 digits day (ex. if today is in 3rd - you must put 03).
hh - means 2 digit hour format(24 hours format, not AM or PM)- ex. for 5 PM you must use the digits 17, for 6 AM is06, etc. ;
mm - is 2 digit format for minutes and
ss - is 2 digit format for seconds.
If today would be the 1st of April 2023 at 11:30 AM, here is what you should write in the time.txt file: 20230401113050 (no spaces in front or after these digits).
The second line reflects the recording mode set up for your device. To set the device to voice-activated recording please use 1. To set the device to continuous recording mode, please use 0.
To resume: Voice activated recording mode = 1; Continuous recording mode = 0
The third line is to set the LED light indicator mode. Setting the mode to 1 means that the blue LED indicator will keep flashing during recording period to signal the device is working.
Setting the value to 0 will mean that the LED indicator will not flash at all during recording time.
How to initiate recording
Push the RECORDING “ON/OFF” button to “ON” position and the device will start recording once the red indicator light turns green. NOTE: Please note that the device will start in the last Operating Mode that the voice recorder worked before turning OFF.
What is the difference between the 2 recording modes
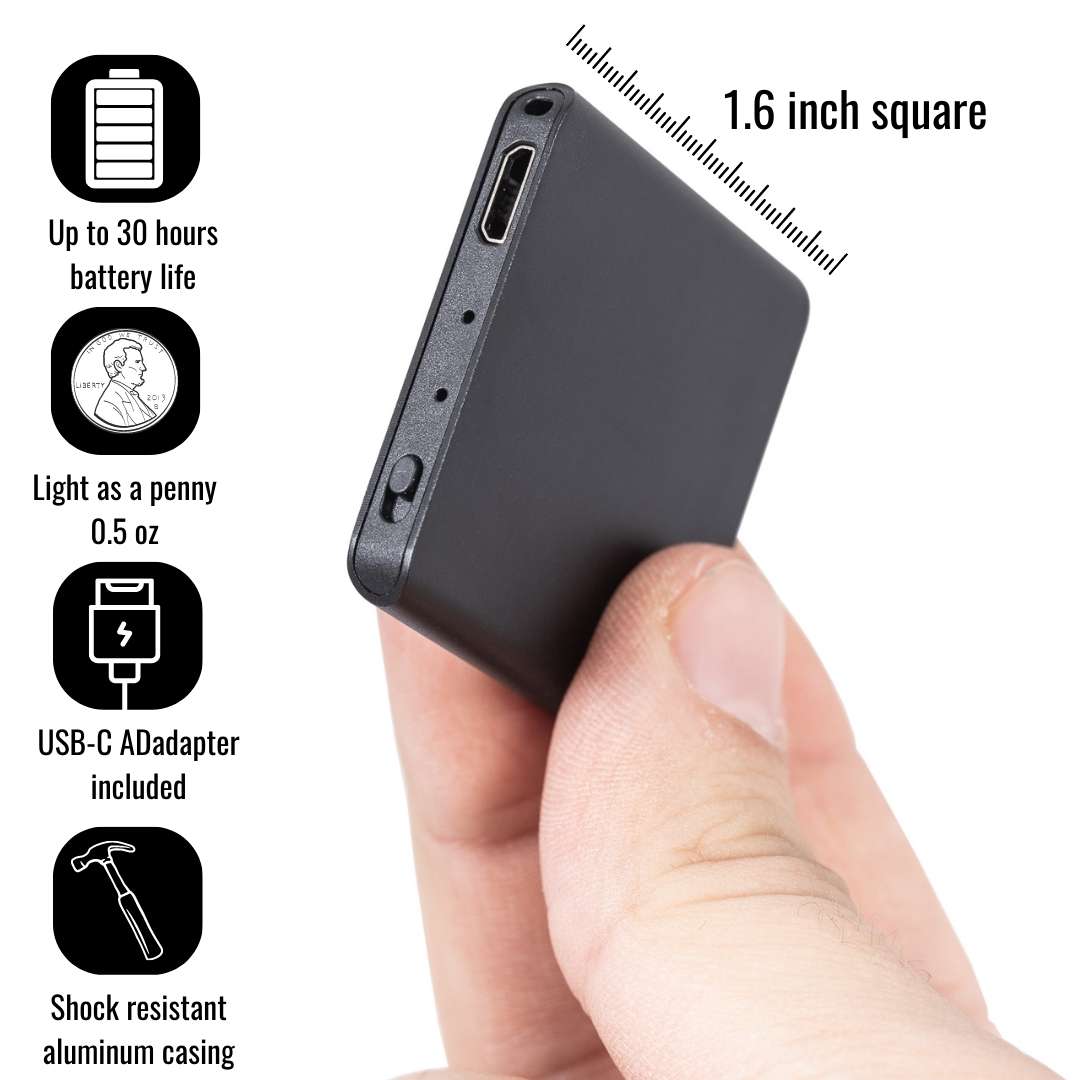
The TileRec voice recorder is set to operate 2 recording modes:
1. Continuous recording mode, with a recording quality of 192Kbps. TileRec will continuously record up to 30 hours on its 8GB memory (on a full battery charge and if enough memory is free) all sounds/voices on a 15 ft radius.
2. Voice activated recording mode with a recording quality of 192Kbps. In this mode, the device will initialise recording ONLY if sounds/voices are detected in its action radius. During completely silent periods the device will stop recording, thus avoiding long hours of silent recording so you can listen the audio file easier.
IMPORTANT! If during the Voice Activated Mode the sounds level drops below 40dB, the device will PAUSE recording automatically. It will resume recording once sounds over 40dB are detected in its range.
The 40 dB is equivalent for a normal voice conversation in a radius of 10 feet.If no sounds are detected for more than 30 minutes, the current audio file will be saved. The device will resume recording and start a new audio file as soon as sounds are detected in its range again.
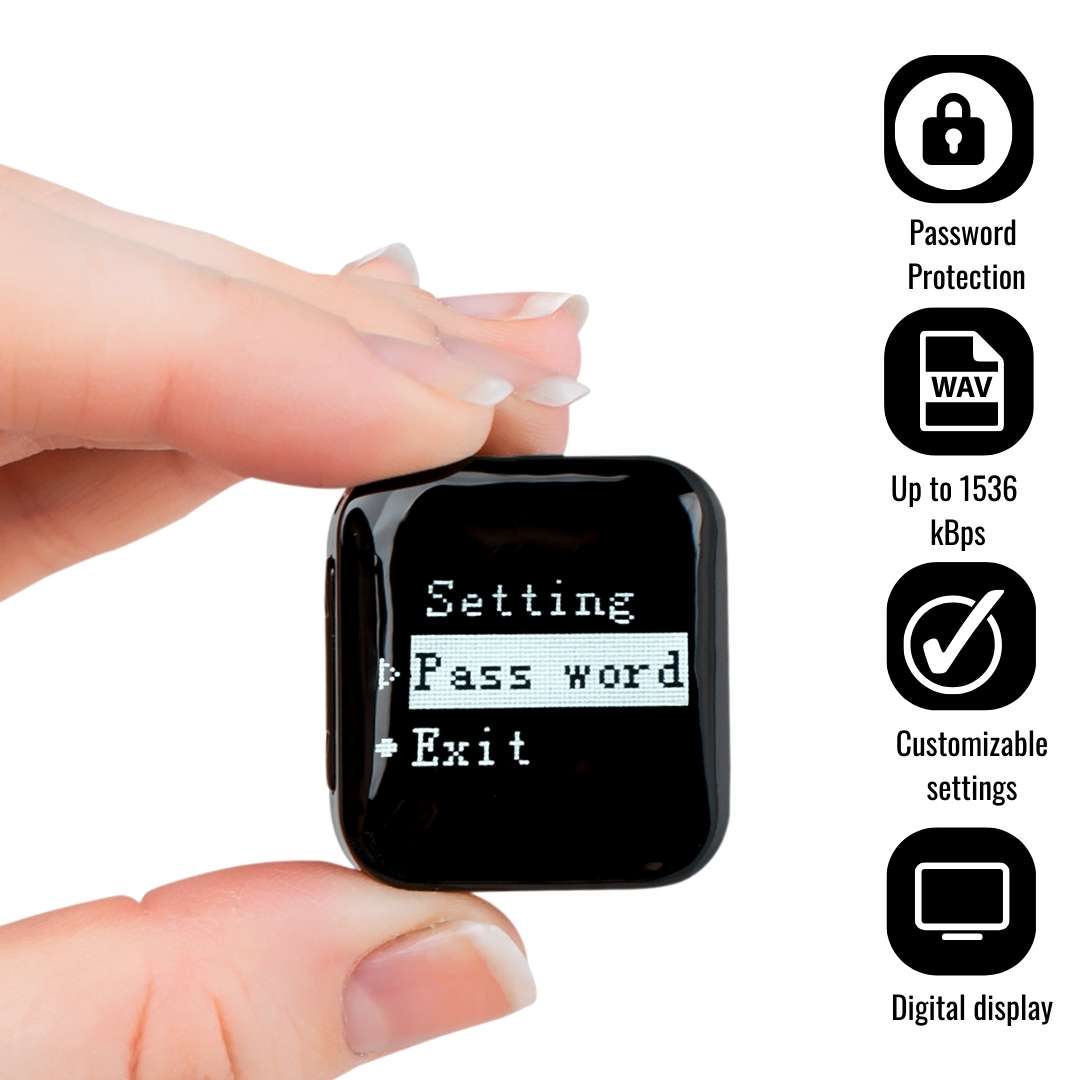
Password setting
The device can be used without any password on it (the default setting comes with “0000” password which means that no password is required when the device is used).
To set your password go in the main menu, choose setting mode, then select Password. In the password menu, you’ll find the 0000 default password.To change one of the password digits, press M to select the digit you need to adjust and then use arrows to scroll to the desired value. When done, press power button to save and exit.
Note: if you set a password on the device, every time you turn it on it will ask for it. Activate the function only if you need it.
What is the voice recorder's battery duration?
The ATTO mini voice recorder can record up to 24 hours on a full charge.
When it’s fully charged, aTTo can record for about 24 hours at 32Kbps recording bit rate, about 20 hours at 192Kbps recording bit rate, about 18hours at 512Kbps recording bit rate, about 9 hours at 1536Kbps recording bit rate.
Resetting the device
When the device stops working, please use a pin or needle to press the reset hole on the back of the device, then the device would be restored.
To reset the device to factory default settings, please press for 15 seconds the UP arrow from the left side of the device. When the reset is completed, on the device’s display will appear the message“Restored!”
What is "Overflow"?
If you start to record and you get the message: “Overflow” it means that the device has a full memory and there is no storage available to save more recordings data. You must download your recorded files onto you computer or, if you don’t need the files anymore, you can delete all by choosing the Format option from the settings menu.
Why do you need to install VLC player?
The audio files your device creates and saves in the folder RECORD are in .wav format which requires specific plugins to playback.
VLC player is a free, open source media player that comes with all the necessary plugins preinstalled. Please install it prior to connecting the device to the computer.
How long does it take to charge when battery is fully drained?
Please connect the recorder to the PC or any USB power source to charge it. When the device is charging, the blue light indicator keeps flashing. The 4 blue led lights will flash intermittently during charging, indicating the actual level of the battery. The recorder is fully charged when the lights stop flashing and remains lit.
• using a 5V/2A output power (see the label of your charger) – 3 hours
• using a 5V/1A output power (see the label of your charger) – 6 hours
The PoweREC battery can last up to 380 hours on a full battery cycle.
NOTE! The recording function is available even when used simultaneously as a power bank to charge other devices. However, due to power consumption, the battery will drain faster than the 380 hours mentioned.If the blue indicator light flashes during recording, it means the power is not enough. The power indicator light will automatically go out after 40 seconds. To shut it sooner, short press the power button twice. When battery level is low you can connect the recorder to power source as it will record and charge simultaneously.
Setting up date and time stamp
Please connect the recorder to the PC and create a new text file into the folder RECORD, with the name of the file: time.
It’s very important that the time.txt file to be in the folder RECORDER, otherwise the device will not set the time and it will use the original date and time of the manufacture date.
So in the folder RECORD you must see now a folder VOICE (where the audio recorded files it will be saved ) and the new text file that you have created before named: time , with the extension of the file .txt . Open time.txt file with any text editor installed in your system and put the current time and date with the following format: yyyymmddhhmmss , where yyyy - is four digit year (ex. 2017), mm - is 2 digit month (ex. for November is 11), dd - 2 digit day (ex. if today is in 3rd - you must put 03). hh - means 2 digit hour in the 24 hours format ( not a.m. or p.m.) - ex. for the time clock 5 p.m. you must use the digit 17, for 6 a.m. is 06, etc; mm - is 2 digit format for minutes and ss - is 2 digit format for seconds.
Let’s take for example of how to create the format of date and time: If today is 22 of April 2020, the time is 05:24 p.m. you must put in the time.txt file the following digits: 20200222172400 (no spaces in front or after these digits). After you insert these digits in the time.txt file save the file, disconnect the recorder from the computer and when you will turn it ON the device will automatically create audio files named after the time and date when you start the device.
Initiate recording
Push the RECORDING “ON/OFF” button to “ON” position and the device will start recording once the red indicator light turns green.
NOTE: Please note that the device will start in the last Operating Mode that the voice recorder worked before turning OFF.You can easily check in what recording mode your device is:• If the green light stays lit, the device is in Continuous Recording Mode.• If the green light blinks, the device is in Voice Activated Mode.To shift between recording modes, please press “Mode” button.
What is the difference between the 2 recording modes
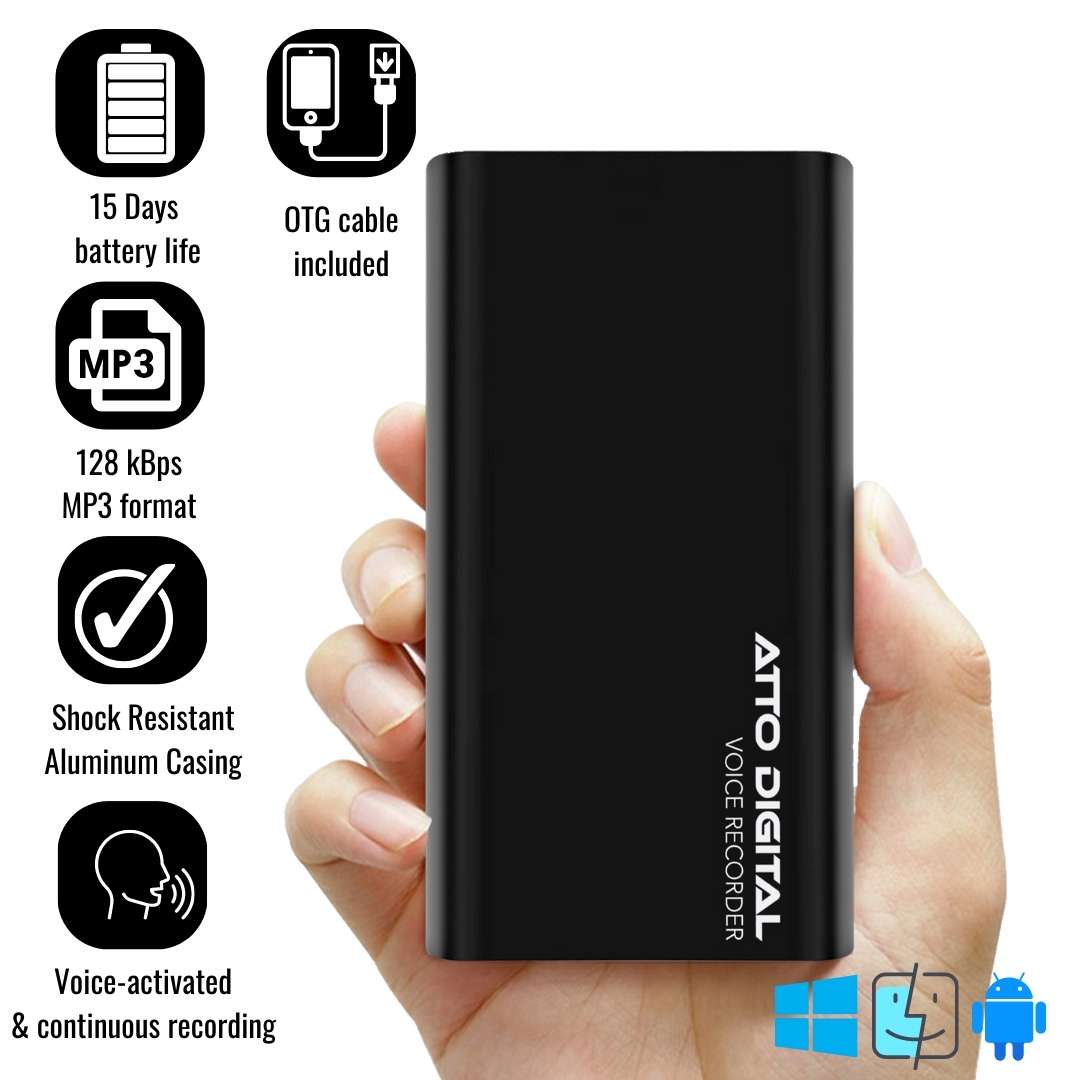
The PoweREC voice recorder is set to operate 2 recording modes:
1. Continuous recording mode, with a recording quality of 128Kbps. PoweREC will continuously record up to 141 hours on its 8GB memory (on a full battery charge and if enough memory is free) all sounds/voices on a 15 ft radius.
2. Voice activated recording mode with a recording quality of 128Kbps. In this mode, the device will initialize recording ONLY if sounds/voices are detected in its action radius. During completely silent periods the device will stop recording, thus avoiding long hours of silent recording so you can listen the audio file easier.
IMPORTANT! If during the Voice Activated Mode the sounds level drops below 40dB, the device will PAUSE recording automatically. It will resume recording once sounds over 40dB are detected in its range. The 40 dB is equivalent for a normal voice conversation in a radius of 10 feet.If no sounds are detected for more than 30 minutes, the current audio file will be saved. The device will resume recording and start a new audio file as soon as sounds are detected in its range again.
Using PoweREC as a power bank
Besides being a reliable voice recorder, the PoweREC is also a great power bank you can use to charge your phone or tablet on the go. You just need to connect the device that needs charging to the USB output of the power bank. Please remember that when the power bank is fully charged all the 4 blue led lights are lit. Each blue light represents 25% of the battery, so if one goes out it means that the battery life of your device reduced with 25%. When your device has only one flashing blue light it means that it needs charging.
How to check for battery and memory level
To check the power level please short press the Power Bank Button:
• 4 blue leds – 100% battery level
• 3 blue leds – 75% battery level
• 2 blue leds – 50% battery level
• 1 blue led – 25% battery level
When the built-in memory is full, the light will blink very fast for 10 seconds and then automatically turn OFF.
Please connect the device to PC to delete or transfer unnecessary files and free some space on the device’s memory. If you don’t need the recorded files anymore, you can choose to FORMAT the drive, which will quickly erase all files on the drive.
How to set up time and date stamp
Please connect the recorder to the PC and create a new text file into the folder RECORD, with the name of the file: time .
It’s very important that the time.txt file to be in the folder RECORDER, otherwise the device will not set the time and it will use the original date and time of the manufacture date. So in the folder RECORD you must see now a folder VOICE (where the audio recorded files it will be saved ) and the new text file that you have created before named: time , with the extension of the file .txt .
Open time.txt file with any text editor installed in your system and put the current time and date with the following format: yyyymmddhhmmss , where yyyy - is four digit year (ex. 2023), mm - is 2 digit month (ex. for November is 11), dd - 2 digit day (ex. if today is in 3rd - you must put 03). hh - means 2 digit hour in the 24 hours format ( not a.m. or p.m.) - ex. for the time clock 5 p.m. you must use the digit 17, for 6 a.m. is 06, etc; mm - is 2 digit format for minutes and ss - is 2 digit format for seconds.
Let’s take for example of how to create the format of date and time:If today is 22 of April 2023, the time is 05:24 p.m. you must put in the time.txt file the following digits: 20230222172400 (no spaces in front or after these digits). After you insert these digits in the time.txt file save the file, disconnect the recorder from the computer and when you will turn it ON the device will automatically create audio files named after the time and date when you start the device.
Charging the device
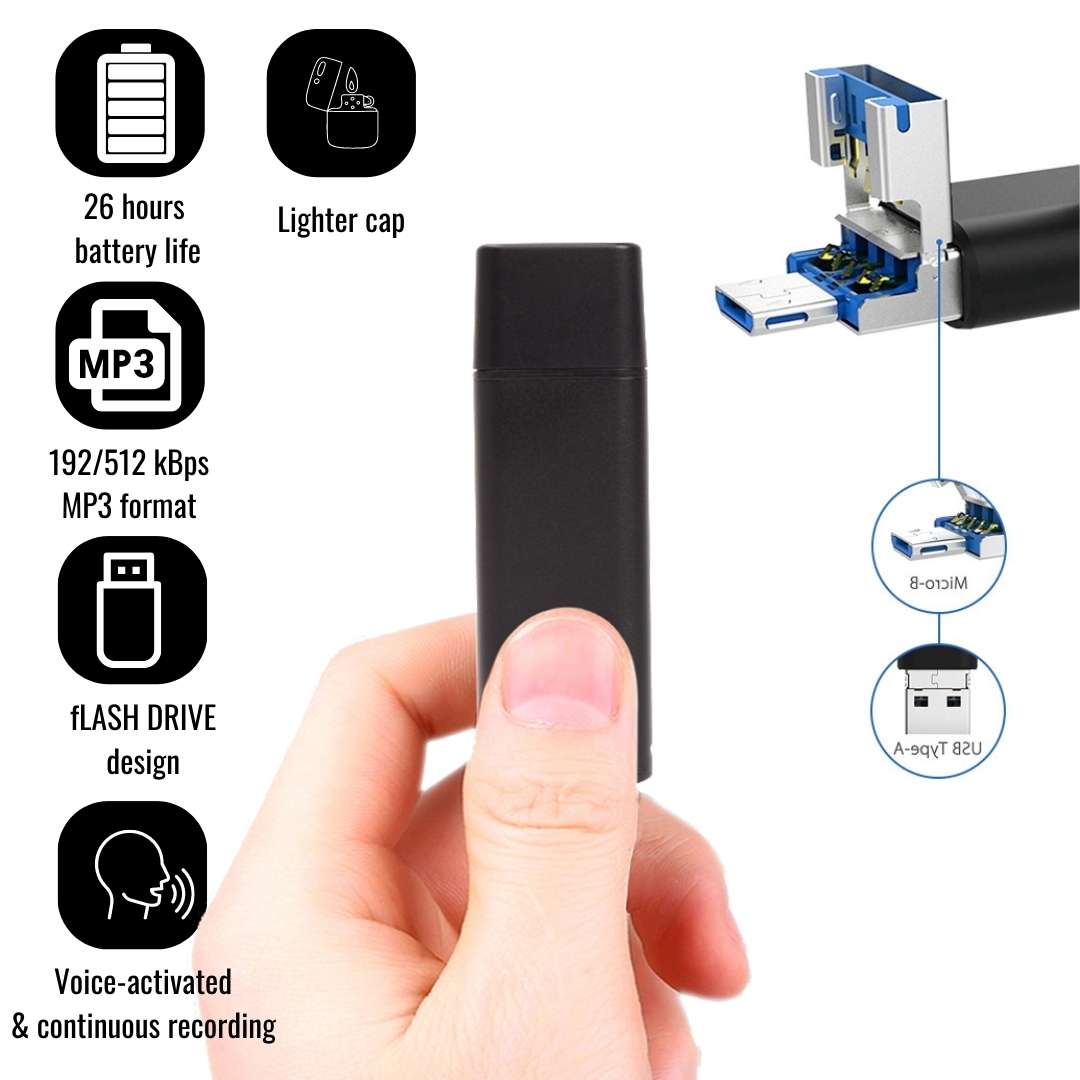
Connect the LightRec directly to the computer or the Android phone you own.
When the red light blinks, it means charging, when fully charged, the indicator light steady red. It can continue recording about 26 hours once fully recharged.
Note: If the indicator light becomes red and blinking during recording, it means the battery is low; please stop recording and charge the device.
The device doesn’t capture parts of conversations
Since the device start recording when the sound reaches the level of 45dB (which is the level for a normal voice conversation from about 6-8 feet), please make sure that the device is close enough to the subject that you need to record.Please run some distance tests before using in a real situation for a better understanding about how the device works.
Note: Some slight voice will not be recorded (sounds below 45db). Stop/start the recording at a sound higher than 45dB is the normal working mode for this device. Not capturing sounds below this level is not a defect; just be sure to put the device close enough to the subject to be record.
How to optimize recording
To ensure the best recording quality please make sure you place the LightRec mini voice recorder as close as possible to the sound source.
If hiss or noise is captured on the audio please try using audio editing software like Audacity .
This will help clean the audio and have a better quality of the recording.
How to set up time and date stamp
Please connect the recorder to the PC and create a new text file into the folder RECORD, with the name of the file: time . It’s very important that the time.txt file to be in the folder RECORDER, otherwise the device will not set the time and it will use the original date and time of the manufacture date. So in the folder RECORD you must see now a folder VOICE (where the audio recorded files it will be saved ) and the new text file that you have created before named: time , with the extension of the file .txt . Open time.txt file with any text editor installed in your system and put the current time and date with the following format: yyyymmddhhmmss , where yyyy - is four digit year (ex. 2017), mm - is 2 digit month (ex. for November is 11), dd - 2 digit day (ex. if today is in 3rd - you must put 03). hh - means 2 digit hour in the 24 hours format ( not a.m. or p.m.) - ex. for the time clock 5 p.m. you must use the digit 17, for 6 a.m. is 06, etc; mm - is 2 digit format for minutes and ss - is 2 digit format for seconds. Let’s take for example of how to create the format of date and time: If today is 22 of April 20199, the time is 05:24 p.m. you must put in the time.txt file the following digits: 20190222172400 (no spaces in front or after these digits). After you insert these digits in the time.txt file save the file, disconnect the recorder from the computer and when you will turn it ON the device will automatically create audio files named after the time and date when you start the device.
Let’s take for example of how to create the format of date and time:If today is 22 of April 2020, the time is 05:24 p.m. you must put in the time.txt file the following digits: 20200222172400 (no spaces in front or after these digits). After you insert these digits in the time.txt file save the file, disconnect the recorder from the computer and when you will turn it ON the device will automatically create audio files named after the time and date when you start the device.
Charging the device
Connect the USB cable to computer and to the NanoREC voice recorder.
When the red light blinks, it means charging, when fully charged, the indicator light steady red. It can continue recording about 20 hours once fully recharged.
Note: If the indicator light becomes red and blinking during recording, it means the battery is low; please stop recording and charge the device.
The device doesn’t capture parts of conversations
Since the device start recording when the sound reaches the level of 45dB (which is the level for a normal voice conversation from about 6-8 feet), please make sure that the device is close enough to the subject that you need to record.Please run some distance tests before using in a real situation for a better understanding about how the device works.
Note: Some slight voice will not be recorded (sounds below 45db). Stop/start the recording at a sound higher than 45dB is the normal working mode for this device. Not capturing sounds below this level is not a defect; just be sure to put the device close enough to the subject to be record.
Why do you need to install VLC player?
The audio files your device creates and saves in the folder RECORD are in .wav format which requires specific plugins to playback.
VLC player is a free, open source media player that comes with all the necessary plugins preinstalled.
Please install it prior to connecting the device to the computer.
Manuals
How to initiate recording
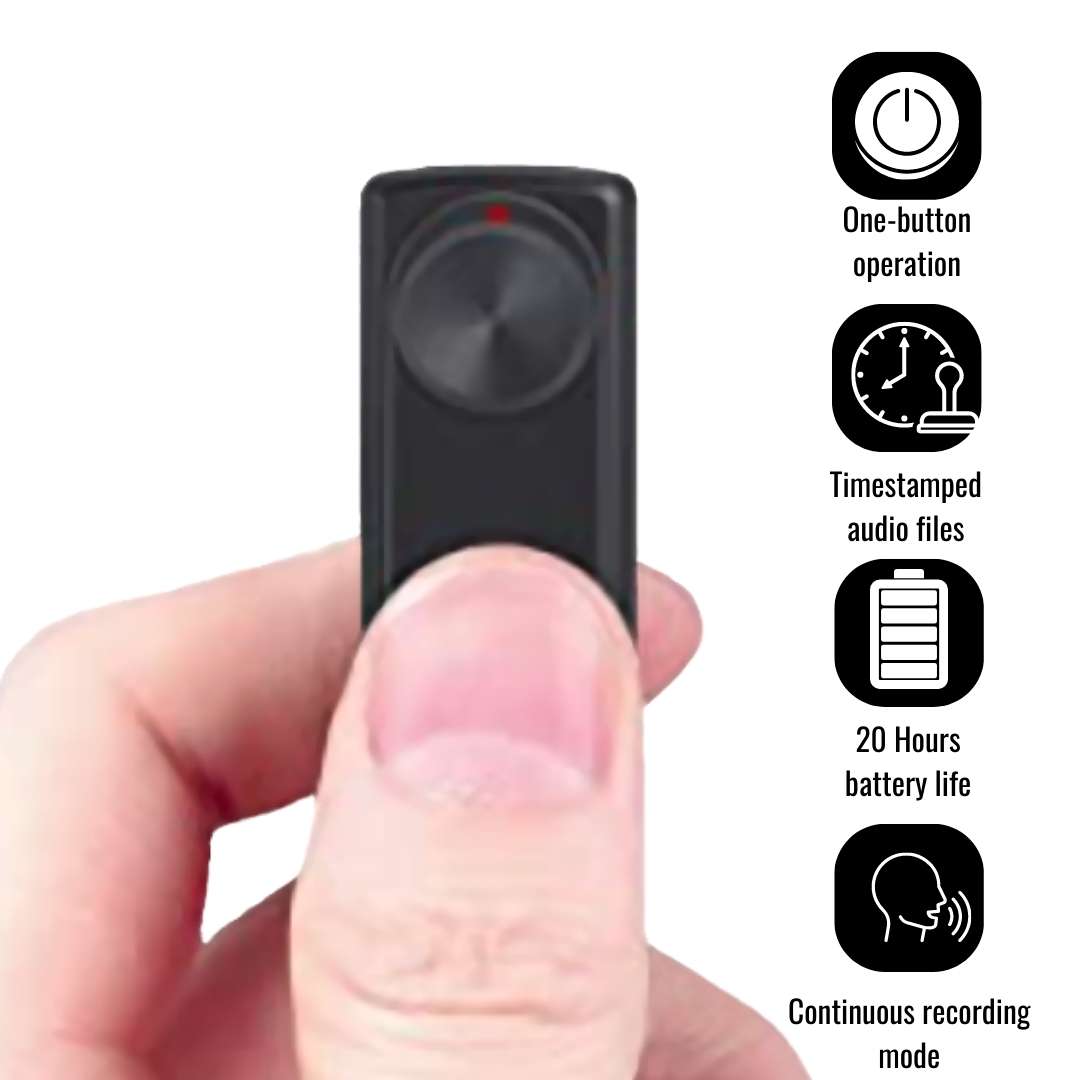
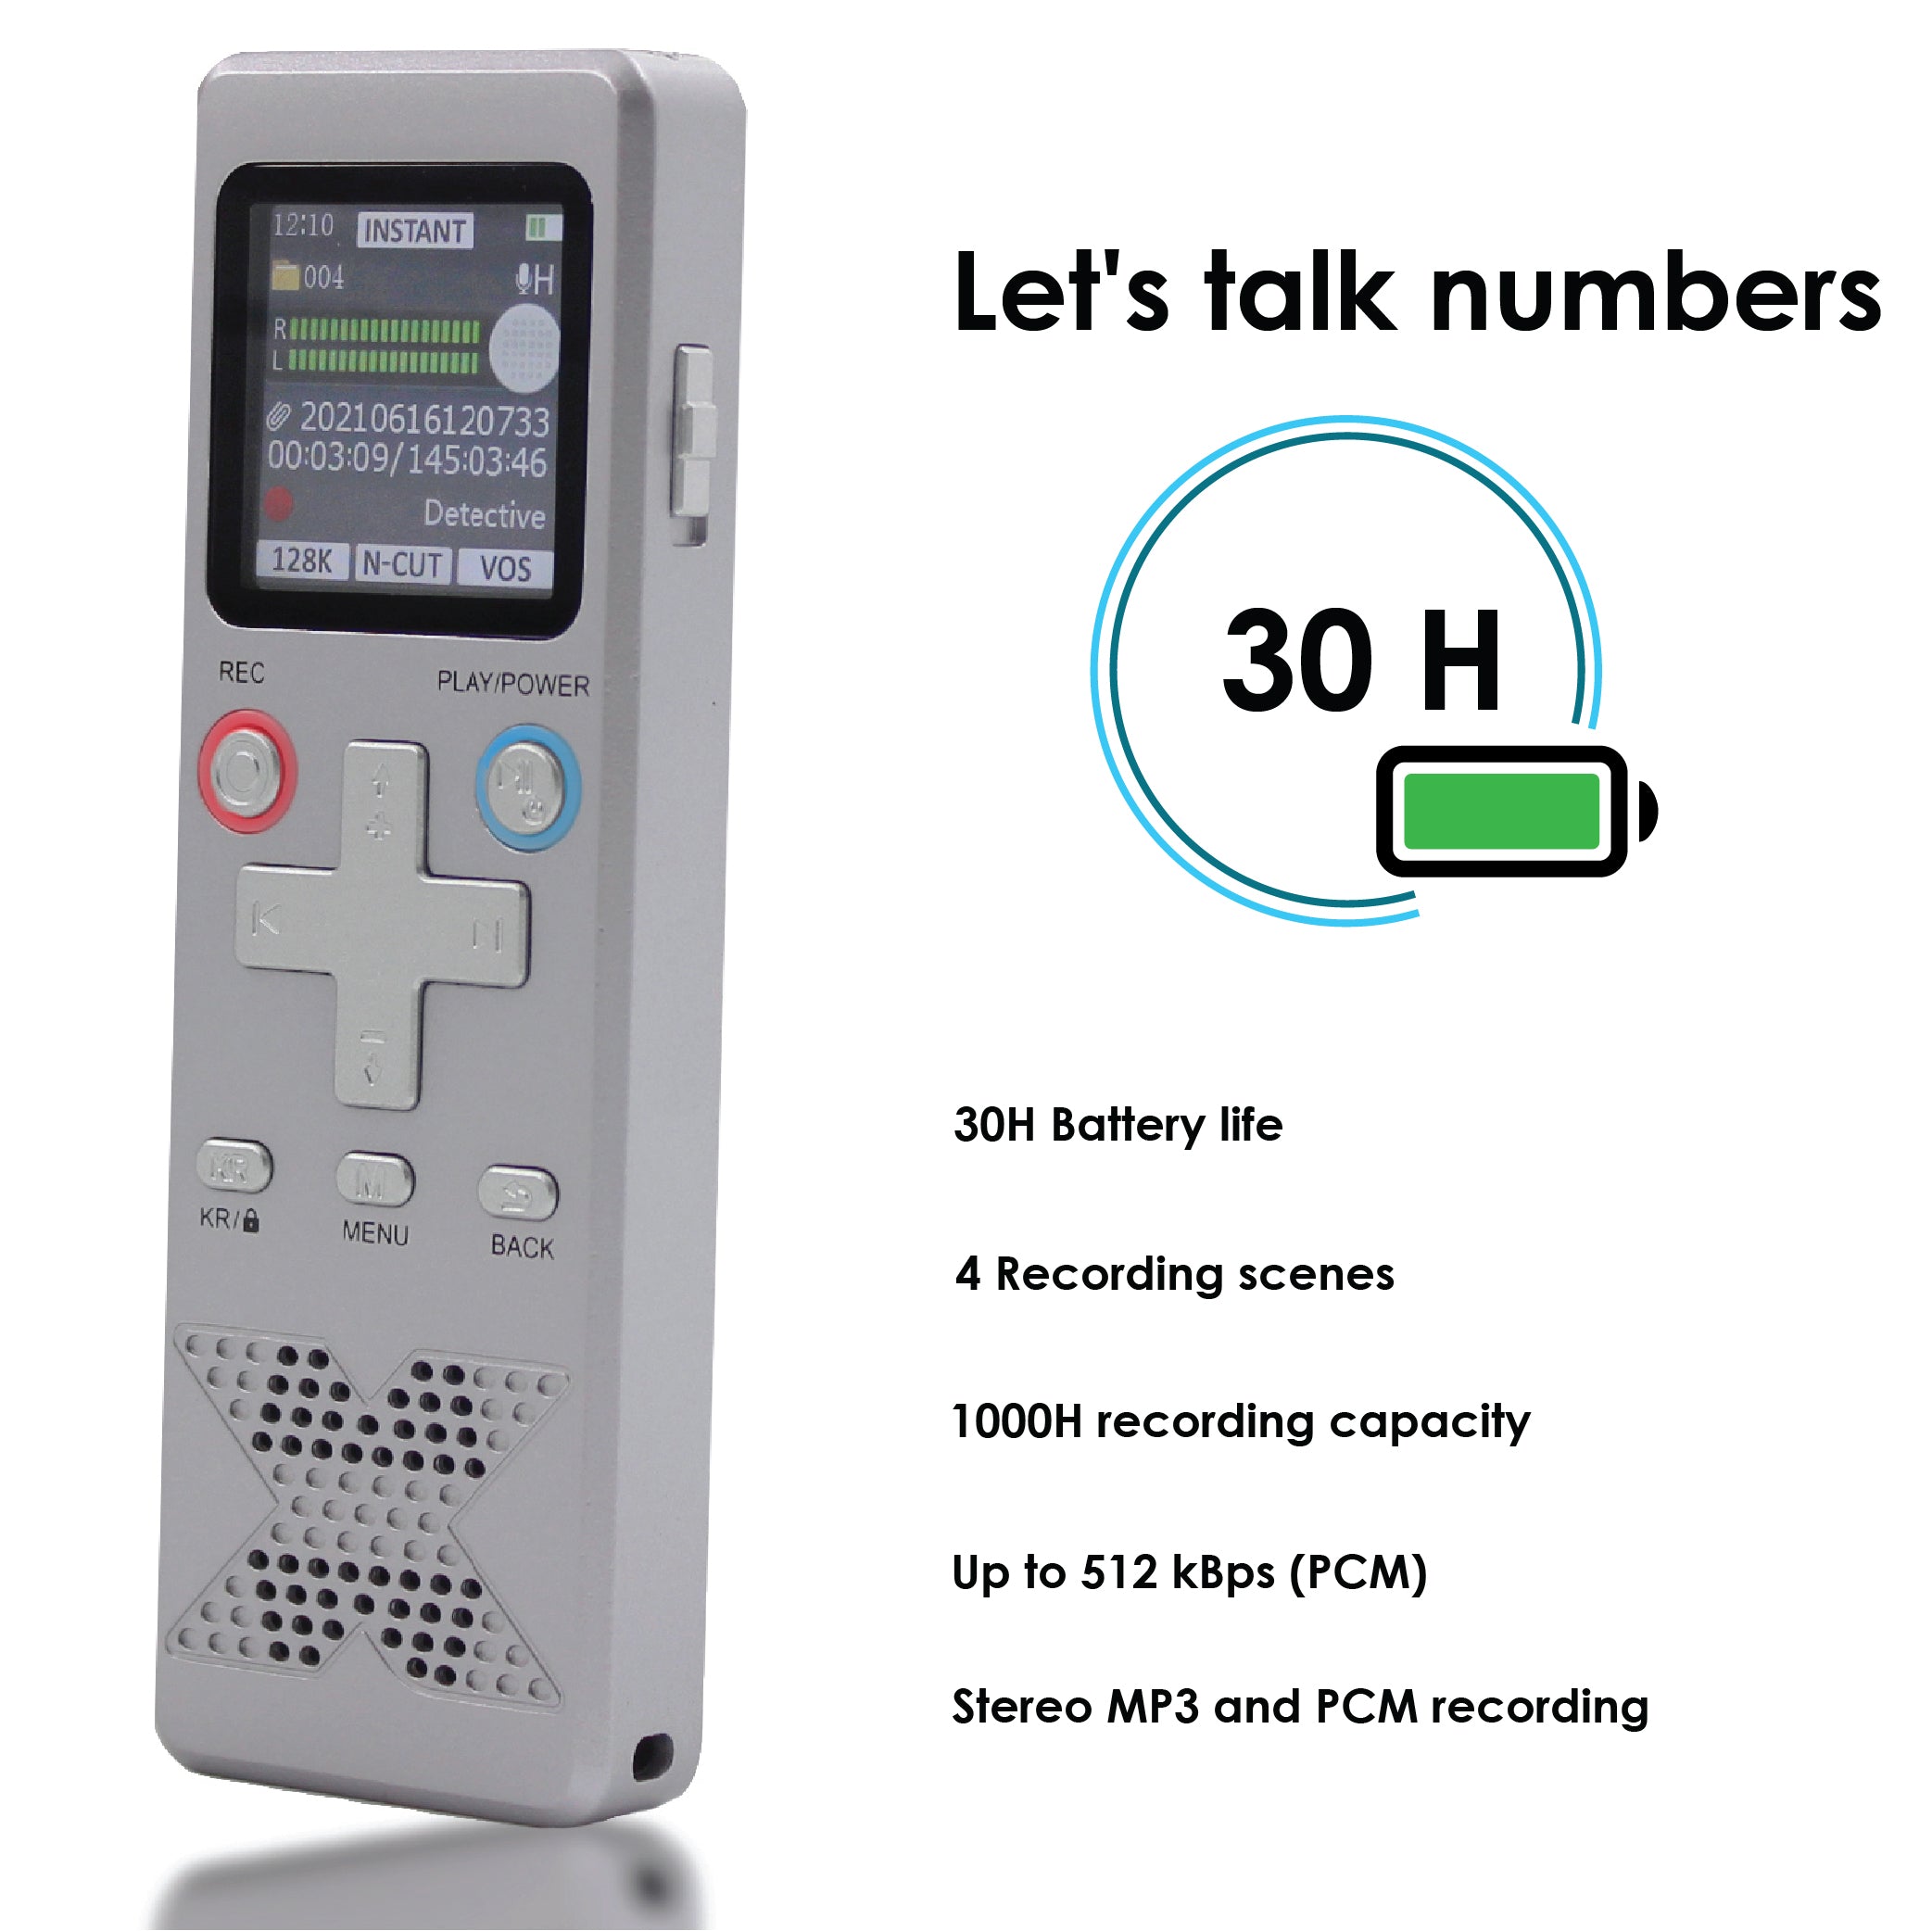
Classic Voice Recording
⦁ Press the “PLAY/POWER” button for 2 seconds to turn on FirstRec. The screen will turn on and enter the menu
⦁ Press the “REC” button to start recording. The left and right volume lines will move as per the intensity of the sounds in order to signal that the microphone is recording.
⦁ Press the “REC” button again in order to save and stop the recording.
⦁ Press the “Play/Power” button for 2 seconds to shut down the device.
InstantOn
⦁ Slide the lateral button (placed on the right side) to start recording immediately.
⦁ Slide the button down to stop and save the recording.
⦁ Press the “Play/Power” button for 2 seconds to shut down the device.
Kind Reminder
⦁ Press the “PLAY/POWER” button for 2 seconds to turn on FirstRec. The screen will turn on and enter the menu.
⦁ Press the “KR” button to start recording. The left and right volume lines will move as per the intensity of the sounds in order to signal that the microphone is recording.
⦁ Press the “KR” button again in order to save and stop the recording.
⦁ Press the “Play/Power” button for 2 seconds to shut down the device.
How to playback
Playback on computer
Make sure your device is tuned off when you connected to the computer via the USB-C cable provided in the box.
Once connected, please access the partition of the FirstRec (check in My PC for Windows computers or under “Devices” for MacBook computers). In the folder “RECORD” you will be able to access all the audio files created.
Select the one you need and double click on it to playback on your preferred media player software.
Direct playback
⦁ Use the arrows RIGHT and LEFT to scroll to the “Playback” icon in the Menu.
⦁ Press the “Play/Power” button shortly in order to access the submenu with the 3 recording files. Each folder is named based on the recording type you use:
⦁ “REC” Recordings
⦁ “Instant” Recordings Use the UP & DOWN arrows to select the folder that you wish to access and press “PLAY/POWER” button in order to access it.
⦁ Select the audio file you wish to playback and press “PLAY/POWER” button in order to playback audio
⦁ Press “PLAY/POWER” button to PAUSE playback or press the BACK arrow to return to Recordings’ folders menu.
Playback via headphones
⦁ Connect the headphones to your device.
⦁ Use the arrows RIGHT and LEFT to scroll to the “Playback” icon in the Menu.
⦁ Press the “Play/Power” button shortly in order to access the submenu with the 3 recording files. Each folder is named based on the recording type you use:
⦁ “REC” Recordings
⦁ “Instant” Recordings
⦁ “KR” Recordings
⦁ Use the UP & DOWN arrows to select the folder that you wish to access and press “PLAY/POWER” button in order to access it.
⦁ Select the audio file you wish to playback and press “PLAY/POWER” button in order to playback audio.
⦁ Press “PLAY/POWER” button to PAUSE playback or press the BACK arrow to return to Recordings folders menu.
Note: Use the UP/DOWN arrows to adjust the volume of the audio.
Use the LEFT/ RIGHT arrows to shuffle between recordings.
How to set up password
⦁ Use the left and right arrows to scroll through the menu, until you get to the “Device Settings” icon.
⦁ Select the folder by pressing the “PLAY/POWER” button.
⦁ Use the UP and DOWN arrows to highlight the option “Password”.
⦁ When New Password is available on screen you can use the UP and DOWN arrows to scroll to the desired digit.
⦁ Once you get to the desired digit, press the RIGHT arrow to go to the next one.
⦁ After you set your password, short press the “Power” button to save it and be redirected to the Settings menu.
Change password
⦁ To change the password on your device you need to first confirm the password in use (Original Password) and set up a new Password.
⦁ After you set your new password, short press the “Power” button to save it and be redirected to the Settings menu.
Disable password
If you wish to disable the password, please make sure that the new password you set is “0000”.
Note : When you initiate a recording via InstantOn the device will not ask for a password to turn on or playback.
Formatting the voice recorder
WARNING: This option will COMPLETELY ERASE ALL THE FILES on the device!
TIP: Formatting is a recommended troubleshooting step when the partition of the device is not recognized by your computer.
⦁ Use the left and right arrows to scroll through the menu, until you get to the “Device Settings” icon. Select the folder by pressing the “PLAY/POWER” button.
⦁ Use the UP and DOWN arrows to highlight the option “Format device”.
⦁ You will be prompted with a warning “All data will be deleted. Continue?”
⦁ Use the RIGHT or LEFT arrows to scroll to the desired response.
⦁ Press the Power button to confirm and then wait until you are redirected to the previous menu.
How to reset the voice recorder
When the dictaphone stops responding during use, press and hold the "PLAY” for about 15 seconds and then release it to restart. This will reset the firmware and repair potential errors.
Fast Reset to Factory Settings: Long press the "M" button for 10 seconds in the main menu and the device will revert back to the factory settings, including the language to English.